Navigating AngelBlock: A User Interface Guide
27 Jun 2023 · 3 min read

Product
Product
Raise
Raise
Guide
Guide
Update: To support your journey, we've updated this guide with a full video tutorial, courtesy of Nicholas Merten, that covers every aspect of AngelBlock - from fundraising to our unique milestone mechanics. You can view the tutorial here.
As we gear up for the SOLA-X fundraising commencing on June 29th, it's the perfect time to familiarize yourself with the investment process on AngelBlock. This step-by-step guide, supported by screenshots of our platform, will help you navigate the upcoming SOLA-X raise with ease.
Step 1: Browse Projects
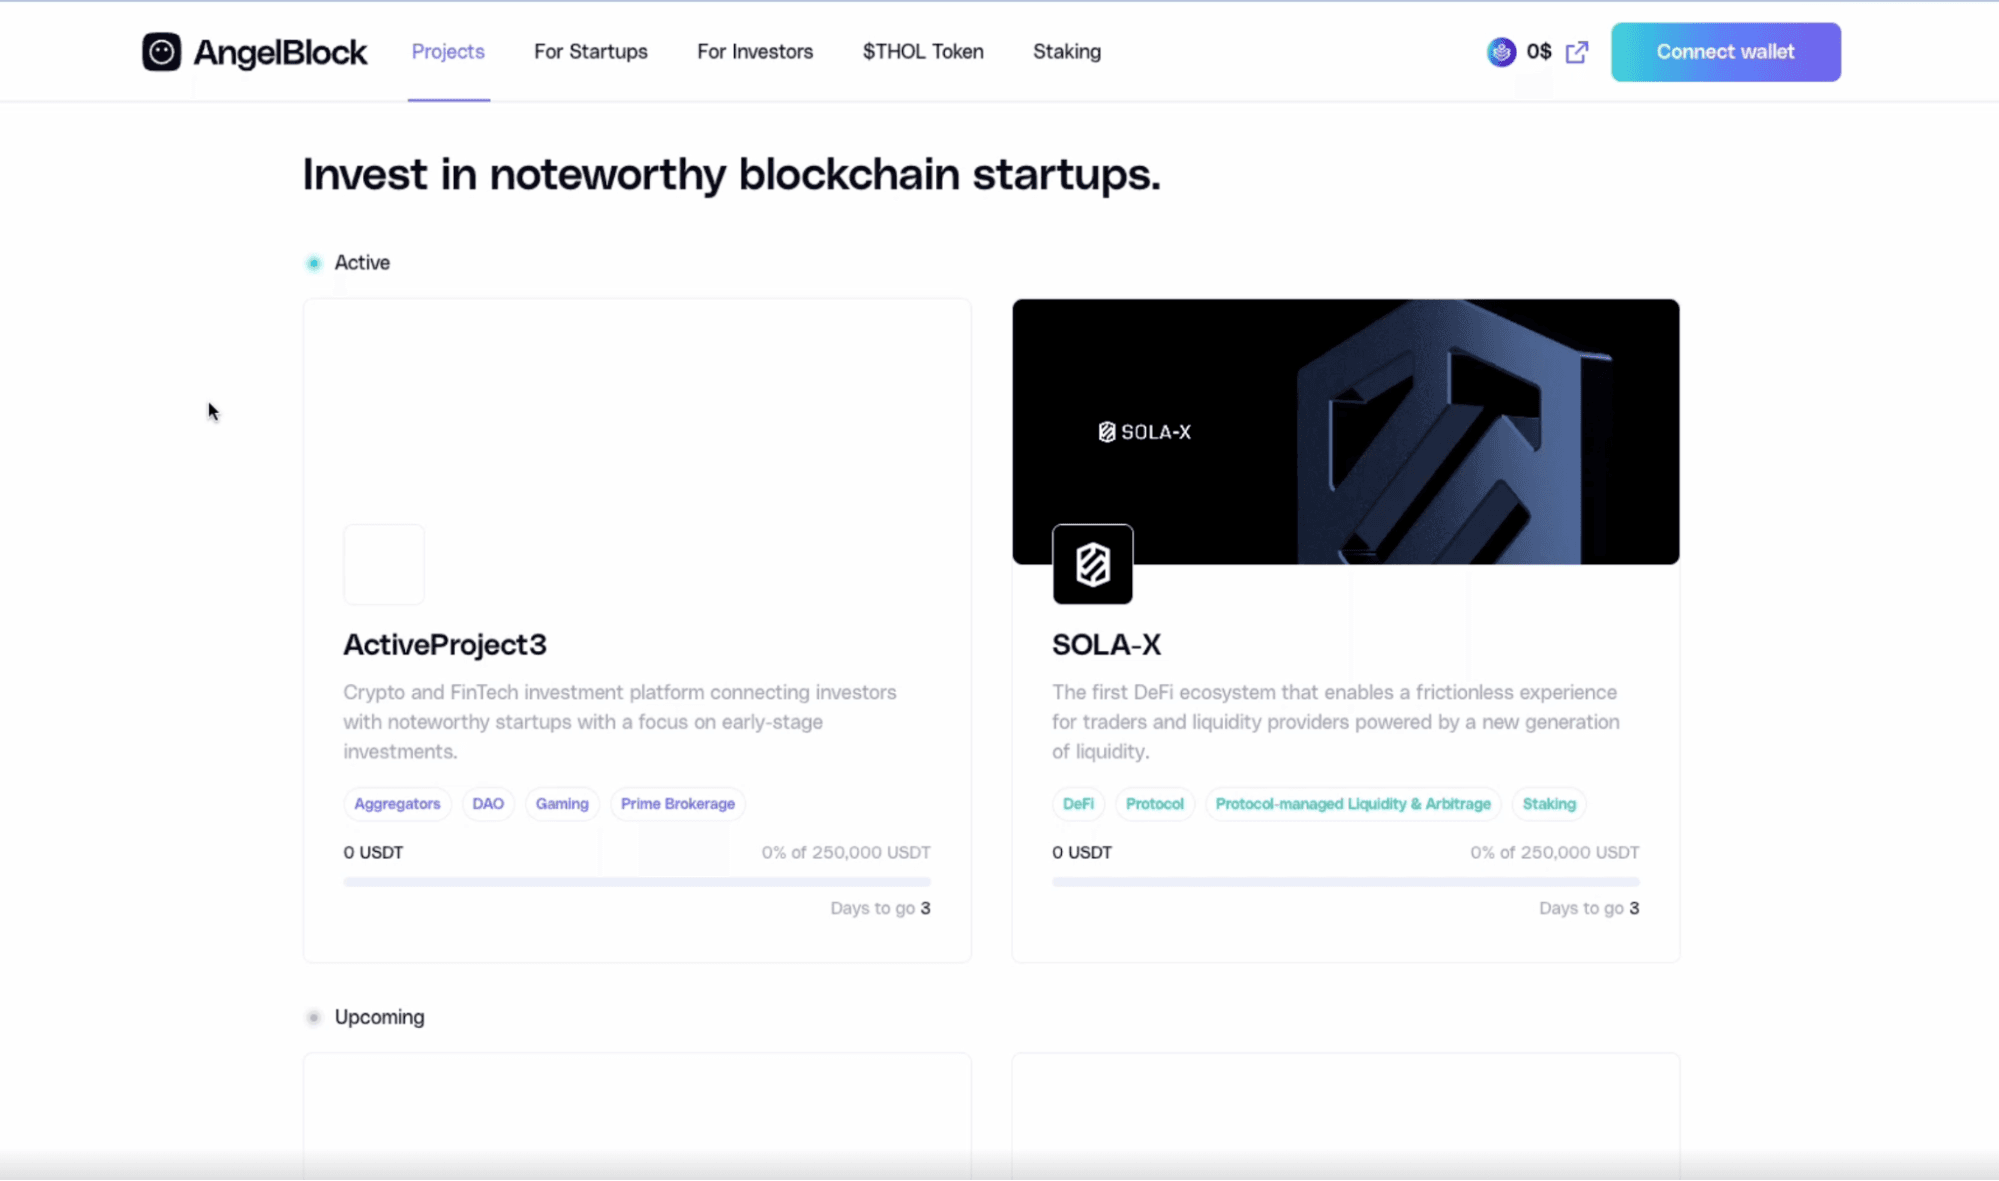 Your investment journey begins on the 'Projects' page. Here, you can explore all active and upcoming fundraising campaigns, including the anticipated SOLA-X raise.
Step 2: Learn More About a Project
 Upon clicking on the selected project, you'll be directed to a detailed page presenting comprehensive information about the startup, including its description, tokenomics, and team.
On the right side, you'll find specifics of the fundraising campaign, such as the start time, target amount, and current amount raised. Also, you'll see your investment tier, based on the amount of THOL you've staked. To stake more THOL, simply click 'Stake THOL'.
Step 3: Connect Your Wallet and Invest
 Ready to invest? Click 'Connect Wallet'. Once connected, click 'Invest Now' to specify your contribution amount. Keep in mind that for investments over $999, you'll need to complete the KYC process. Refer to this guide to carry out the KYC verification process.

Step 4: Approve Payment
 Upon entering your desired investment amount, proceed to 'Approve Payment'. This step initiates your allowance setup. You're presented with two options:
- Unlimited: Opt for this to set up your allowance just once, covering all future transactions. This choice is cheaper as it involves a one-time gas fee.
- Single Transaction: Choose this if you prefer setting up your allowance for each transaction separately. Though safer, this option incurs a gas fee for every transaction.
After selecting your allowance setup, confirm the operation in your digital wallet.
Step 5: Proceed with Payment
 After approving the transaction, click 'Proceed with Payment' and confirm in your wallet. Congratulations, you've now invested in a project on AngelBlock!
Step 6: Confirmation Message and Badge
Step 7: Investor Dashboard
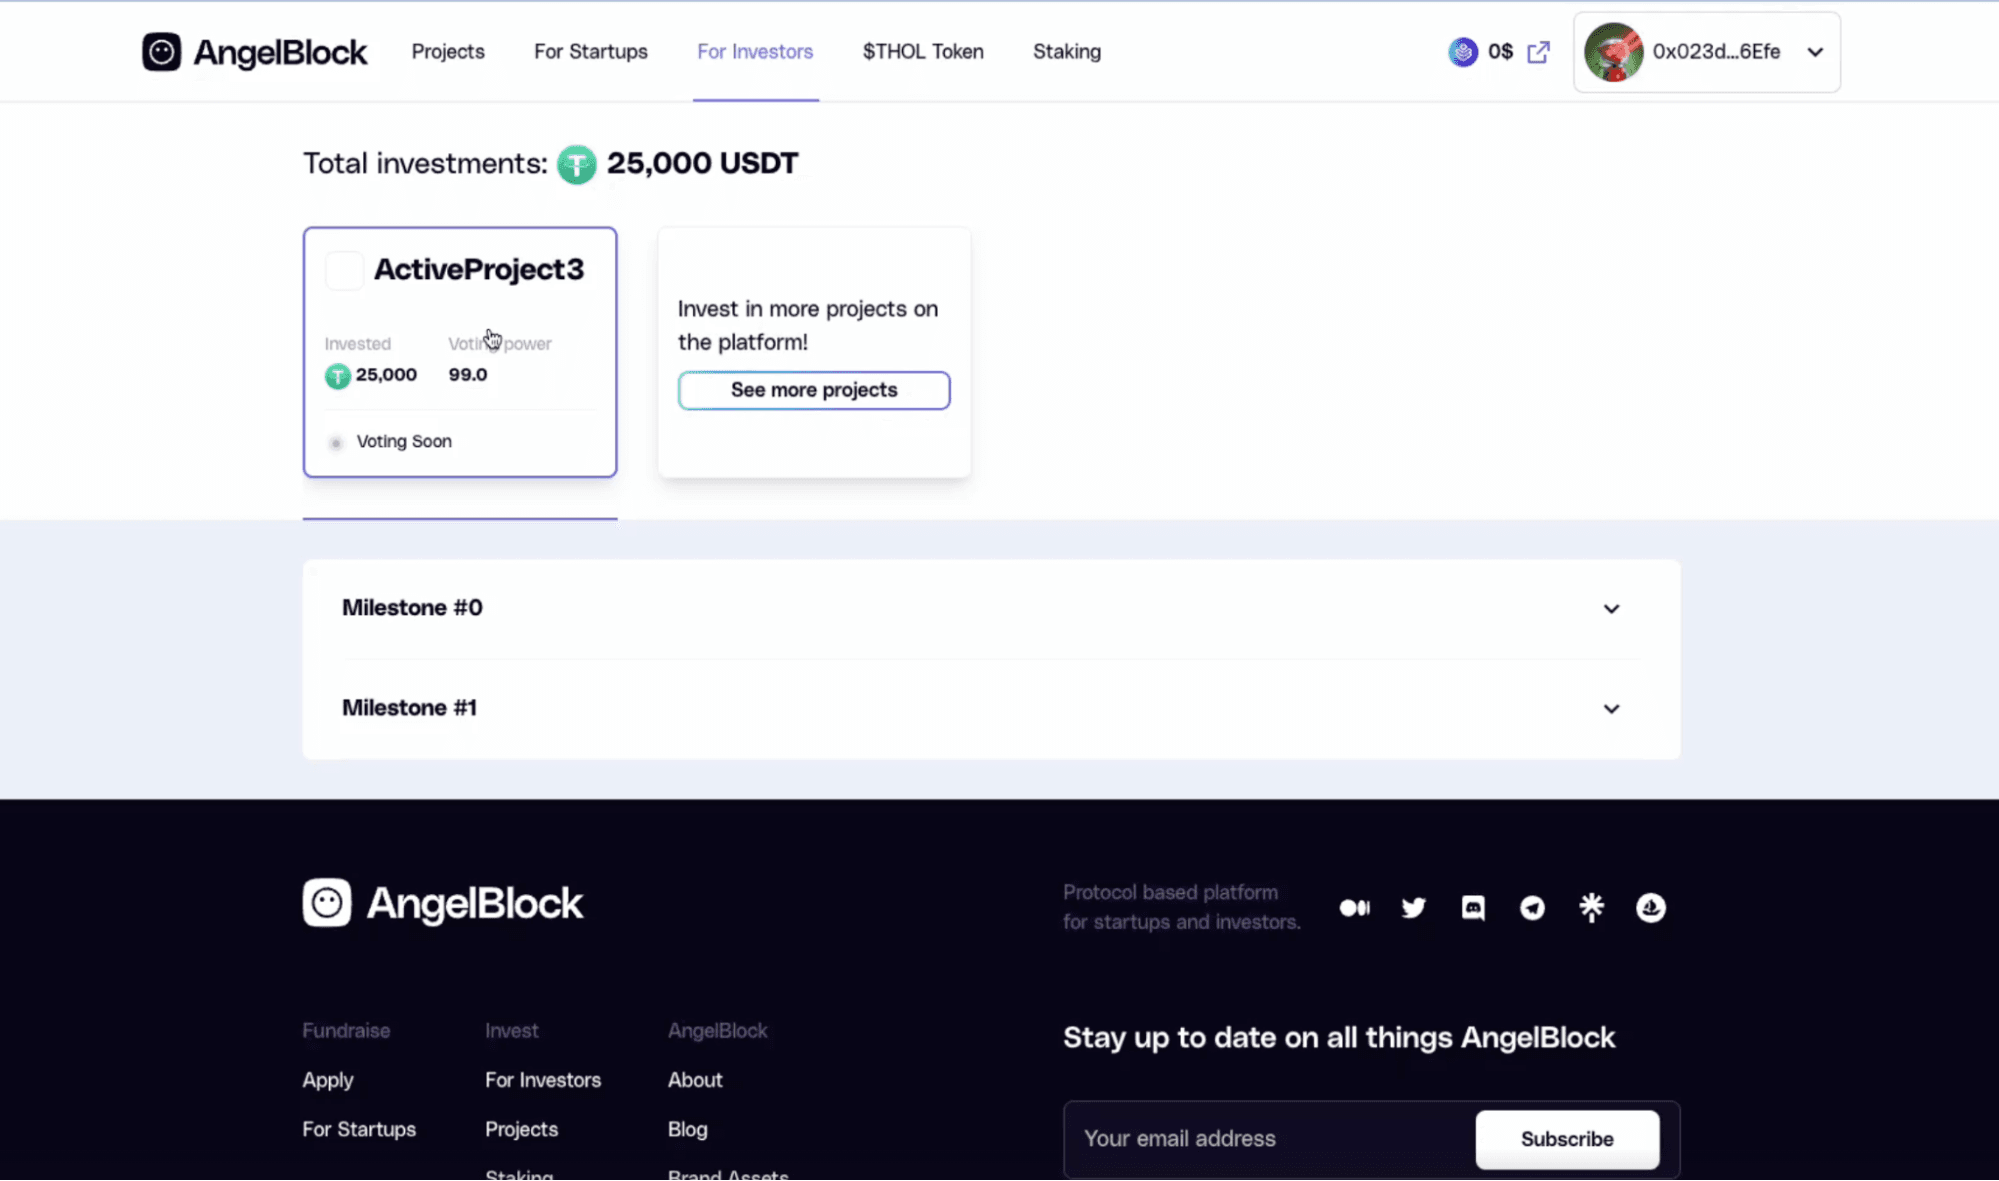 After your first investment, you gain access to the 'Investor Dashboard'. This is your go-to place to monitor all your investments, and understand the upcoming milestones and voting events.
As we count down to the start of the SOLA-X fundraising, we hope this guide along with the comprehensive video tutorial will make your investment journey smooth and rewarding.
Written by: Christian Santagata
You may find interesting:
03 Dec 2024 · 15 min read
AngelBlock X Amplifi | Amplifi is Coming to AngelBlock
13 Nov 2024 · 10 min read
AngelBlock X Pulsar | Pulsar Raise on AngelBlock
12 Nov 2024 · 10 min read
AngelBlock Bi-Monthly Update: September-October Recap
30 Oct 2024 · 8 min read
AngelBlock X FunctionLand | Next Raise Coming November 6th
View all articles
© 2024 AngelBlock Ltd. All rights reserved